JVC UX-MD9000R Instructions Manual
Ultra micro component system
Hide thumbs
Table of Contents
Advertisement
ULTRA MICRO COMPONENT SYSTEM
ULTRA-MIKRO-KOMPONENTEN-SYSTEM
SYSTEME DE COMPOSANTS ULTRA MICRO
ULTRA MIKRO KOMPONENTENSYSTEEM
SISTEMAS DE COMPONENTES ULTRA MICRO
SISTEMA AD ULTRA MICROCOMPONENTI
UX-MD9000R
SUPER PRO
PTY/EON
REMOTE CONTROL RM-RXUMD9000R
DIMMER
SLEEP
CLOCK
FM MODE TAPE/AUX
AHB.
AUTO
PRESET
PROGRAM
RANDOM
REPEAT
BASS
TREBLE
CANCEL
EDIT
DISPLAY
/TITLE
/CHARA
UP
<
>
SET
DOWN
DISPLAY MODE
TUNER
MD
CD
BAND
VOLUME
INSTRUCTIONS
BEDIENUNGSANLEITUNG
MANUEL D'INSTRUCTIONS
GEBRUIKSAANWIJZING
MANUAL DE INSTRUCCIONES
ISTRUZIONI
AHB.
PRESET
SLEEP
SUPER PRO
TUNING
DOWN
MULTI CONTROL
UP
CLOCK
OPEN/CLOSE
TUNER
MD/TAPE
BAND
CD
STANDBY
PHONES
ULTRA MICRO COMPONENT SYSTEM
UX-MD9000R
For Customer Use:
Enter below the Model No. and Serial No.
which are located either on the rear, bot-
tom or side of the cabinet. Retain this
information for future reference.
Model No.
Serial No.
LVT0053-001B
[E]
Advertisement
Table of Contents

Related Manuals for JVC UX-MD9000R


Summary of Contents for JVC UX-MD9000R
- Page 1 ULTRA MICRO COMPONENT SYSTEM ULTRA-MIKRO-KOMPONENTEN-SYSTEM SYSTEME DE COMPOSANTS ULTRA MICRO ULTRA MIKRO KOMPONENTENSYSTEEM SISTEMAS DE COMPONENTES ULTRA MICRO SISTEMA AD ULTRA MICROCOMPONENTI UX-MD9000R REMOTE CONTROL RM-RXUMD9000R DIMMER SLEEP CLOCK FM MODE TAPE/AUX AHB. AUTO SUPER PRO PRESET PROGRAM RANDOM REPEAT...
- Page 2 2. Ne pas exposer l’appareil à la pluie ni à l’humidité. Per l’Italia: "Si dichiara che il questo prodotto di marca JVC è conforme alle prescrizioni del Decreto Ministeriale n.548 del 28/08/95 pubbli- cato sulla Gazzetta Ufficiale della Repubblica Italiana n.301 del 28/12/95."...
- Page 3 Vorderansicht Face Vooraanzicht Vista frontal Vista frontale 15 cm 1 cm UX-MD9000R Voorzichtig: Goede ventilatie vereist Om brand, elektrische schokken en beschadiging te voorkomen, moet u het toestel als volgt opstellen: 1 Voorkant: Geen belemmeringen en voldoende ruimte. 2 Zijkanten/boven-/onderkant: Geen belemmeringen plaatsen in de hieronder aangegeven zones.
- Page 4 IMPORTANT FOR LASER PRODUCTS/ WICHTIGER HINWEIS FÜR LASER-PRODUKTE / IMPORTANT POUR LES PRODUITS LASER / BELANGRIJKE INFORMATIE VOOR LASERPRODUKTEN / IMPORTANTE PARA LOS PRODUCTOS LÁSER / IMPORTANTE PER I PRO- DOTTI LASER REPRODUCTION OF LABELS/ANBRINGUNGSORTE FÜR LASER-PRODUKTE/REPRODUCTION DES ETIQUETTES/VERKLARING VAN DE LABELS/REPRODUCCIÓN DE ETIQUETAS/RIPRODUZIONE DELLE ETICHETTE 1 CLASSIFICATION LABEL, PLACED ON EXTERIOR SURFACE 1 KLASSIFIZIERUNGSHINWEIS BEFINDET SICH AUF DER AUS-...
-
Page 5: Table Of Contents
The controls and operations have been redesigned to make them very easy to use, freeing you to just enjoy the music. With JVC’s COMPU PLAY you can turn on the System and automatically start the Radio, CD Player, MD •... -
Page 6: Getting Started
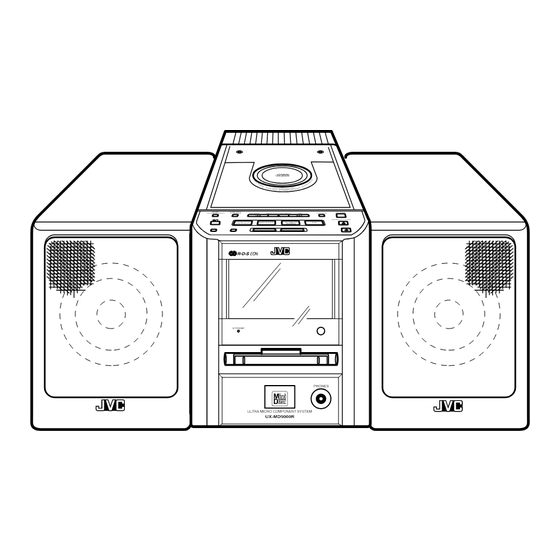
The Remote Control makes it easy to use many of the functions of the System from a distance of up to 7m (23 feet) away. You need to point the Remote Control at the remote sensor on the System’s front panel. R6P(SUM-3)/AA(15F) STANDBY ULTRA MICRO COMPONENT SYSTEM UX-MD9000R Remote sensor PHONES... -
Page 7: Connecting The Fm Antenna
CAUTION: Make all connections before plugging the System into an AC power outlet. Connecting the FM Antenna OPTICAL SUB WOOFER DIGITAL IN(AUX2) AC IN Connecting the AM (MW/LW) Antenna OPTICAL SUB WOOFER DIGITAL IN(AUX2) AC IN Using the Supplied Wire Antenna Using the Coaxial Type Connector (Not Supplied) $ýæèðRKPýDQWHQQDýZLWKýFRD[LDOýW\SHýFRQQHFWRUýõ,(&ýRUý',1éèýêëèô... -
Page 8: Connecting The Speakers
Connect (not supplied) signal cords between the System's LINE IN (AUX1)/OUT terminals and the output/input terminals of the external tape deck, etc. You can listen to one of these sources. Also, you can record the System's CD Player, MD Player, or tuner output signal to the external tape deck, etc.. - Page 9 OPTICAL DIGITAL IN(AUX2) Connecting a Subwoofer System Connect an (not supplied) signal cord between the SUB WOOFER OUT terminal and an external JVC subwoofer system, etc. SUB WOOFER Connecting the AC Power Cord Firmly insert the supplied AC power cord into the AC inlet on the back of the Unit.
-
Page 10: Common Operations
COMPU PLAY JVC's COMPU PLAY feature lets you control the most frequently used System functions with a single touch. With One Touch Operation you can play a CD, an MD, or turn on the radio with a single press of the play button for that function. One Touch Operation turns the power on for you, then starts the function you have specified. -
Page 11: Adjusting The Volume
Adjusting the Volume You can adjust the volume level between 0 and 50. The VOLUME indicator on the display indicates the volume level. VOLUME Press the VOLUME UP button of the Unit to increase the volume or press the VOLUME DOWN button to decrease it. Press the VOLUME + button on the Remote Control to increase the volume or press the VOLUME - button to decrease it. -
Page 12: Using The Tuner
Using the Tuner REMOTE CONTROL RM-RXUMD9000R DIMMER SLEEP CLOCK FM MODE TAPE/AUX FM MODE AHB. AUTO PRESET SUPER PRO AUTO PRESET PROGRAM RANDOM REPEAT BASS TREBLE CANCEL EDIT DISPLAY /TITLE /CHARA < < > > PTY/EON DISPLAY MODE DOWN PTY/EON DISPLAY MODE DOWN TUNER... -
Page 13: To Change The Fm Reception Mode
To cancel the presetting, press the CANCEL button in step 3 or 4. To change the preset stations, repeat the same steps as above. Auto Presetting —————————— In each band, you can automatically preset FM-30, AM (MW/LW)- 15 stations. Preset numbers will be allocated as stations are found, starting from the lowest station and moving up the frequency. - Page 14 ROCK Mý M.O.R.Mý LIGHT Mý CLASSICSý OTH- ER Mý WEATHERý FINANCEý CIAL Aý RELIGIONý PHONE INý LEISUREý JAZZý COUNTRYý IESý FOLK Mý DOCUMENTý TRAFFICý NEWS 3. Press the PTY/EON button within 10 sec- onds again. :KLOHý VHDUFKLQJñý WKHý GLVSOD\ý DOWHUQDWHVý EHWZHHQý ¦6($5&+§ DQGýWKHýVHOHFWHGý37<ýFRGHï...
-
Page 15: Using The Cd Player
The track number that has been played disappears from the music calender. • The CD Player automatically stops when the last track of the CD has finished playing. To stop playing the CD, press the The following information for the CD is displayed. -
Page 16: Programming The Playing Order Of The Tracks
Control. You can program up to 20 tracks in any desired order including the same tracks. You can only make a program when the CD Player is stopped. 1. Insert a CD. 2. Press the CD 38 button. 3. Press the 7 button to stop the CD. -
Page 17: Using The Md Player (Listening To An Md)
You can use Normal, Random, Program or Repeat Play in the same way as for CD Player. Repeat Play can repeat all the tracks or just one of the tracks on the MD. Here are the basic things you need to know to play an MD and locate the different tracks on it. - Page 18 Search Play ———————————— ¢ Holding down the button, during playback, will fast for- ward/backwards the MD so you can quickly find a particular pas- sage in the track you are listening to. Programming the Playing Order of the Tracks You can program the playing order of the tracks using the Remote Control.
-
Page 19: Recording Onto An Md
For the OPTICAL DIGITAL IN (AUX2): 32 kHz, 44.1 kHz and 48 kHz. For the CD Player of the Unit: 44.1 kHz. The recording level, which is the volume at which the new MD is being made, is automatically set correctly, so it is not affected by the VOLUME level of the System. -
Page 20: Using The Md Player (Editing)
The track number for the MD increases synchronous with the track on the CD. • After the CD Player has played the entire CD or all the pro- grammed tracks, "UTOCwriting" appears on the display, indi- cating that the recording is successfully completed. Then, the MD and the CD stops. -
Page 21: Dividing Tracks
Erasing all the tracks (ALL ERASE function) All the tracks can be erased at once without recording fresh material over them. Track No. Track A Track B Track C Track D ERASE New tracks can be recorded. REMOTE CONTROL RM-RXUMD9000R DIMMER SLEEP CLOCK... -
Page 22: Moving Tracks
Note: While “UTOCwriting” is displayed, do not disconnect the power cord or subject the Unit to the vibration to avoid in- correct recording. Joining Tracks (JOIN Function) Use the Remote Control to carry out this function. 1. Insert an MD to be edited with its label side up. 2. - Page 23 2. Press the MD 38 button and then 7 button to set the function to MD. The track numbers and total playback time are displayed. 3. Press the EDIT/TITLE button until "ERASE ?" is displayed. The "EDIT" indicator appears on the display. DIVIDE JOIN MOVE...
- Page 24 5. Input a preferred title (up to 32 charac- ters). Use the following buttons to input a title. [Title editing buttons and their functions] (see below) Button Function DISPLAY Changes the type of characters to be input as fol- /CHARA lows.
-
Page 25: Using External Equipments
First make sure that the external equipment is properly connect- ed to the System. (See page 4). 1. Play the System's CD Player, MD Player, or tune into a station. The recording level is not affected by the VOLUME level set by the System. -
Page 26: Using The Timers
Using the Timers REMOTE CONTROL RM-RXUMD9000R DIMMER SLEEP SLEEP CLOCK FM MODE TAPE/AUX AHB. AUTO SUPER PRO PRESET PROGRAM RANDOM REPEAT PTY/EON BASS TREBLE CANCEL EDIT DISPLAY /TITLE /CHARA CD SYNCHRO < > DOWN PTY/EON DISPLAY MODE TUNER BAND When the System is in use, the display shows other items as well. VOLUME For simplicity, we show here only the items described in this section. -
Page 27: Information On Mds (Minidiscs)
6. Press the TIMER/SNOOZE button on the Unit. The timer setting is completed and the display returns to the dis- play before you set the timer. The timer indicator remains lit. 7. Before turning off the System, prepare the music source selected in step 4. TUNER: Tune in to the desired station. -
Page 28: Md (Minidisc) Error Messages
ATRAC (Adaptive Transform Acous- tic Coding) Within recordings, there are sounds which cannot be readily heard. For example, as the volume decreases, high-pitched sounds and low-pitched sounds become difficult to hear. also, if a quiet sound comes at the same time as or just after a loud sound, it will not be heard. -
Page 29: Minidisc Limitations
Minidisc limitations The minidisc records information in an original format that differs from that of conventional cassette tapes or DATs. Since there are some lim- itations with this recording format, the following types of conditions may arise. These conditions arre not malfunctions. Condition “DISC FULL”... -
Page 30: Care And Maintenance
Care And Maintenance +DQGOHý\RXUý&'VýDQGý0'VýFDUHIXOO\ñýDQGýWKH\ýZLOOýODVWýDýORQJýWLPHï Compact Discs ‡ 2QO\ý&'VýEHDULQJýWKLVýPDUNýFDQýEHýXVHGýZLWKý WKLVý6\VWHPïý+RZHYHUñýFRQWLQXHGýXVHýRIýLUUHJXð ODUýVKDSHý&'VýõKHDUWðVKDSHñýRFWDJRQDOñýHWFïôý FDQýGDPDJHýWKHý6\VWHPï ‡ 5HPRYHýWKHý&'ýIURPýLWVýFDVHýE\ýKROGLQJýLWýDWý WKHýHGJHVýZKLOHýSUHVVLQJýWKHýFDVH©VýFHQWHUýKROHý OLJKWO\ï ‡ 'RýQRWýWRXFKýWKHýVKLQ\ýVXUIDFHýRIýWKHý&'ñýRUý EHQGýWKHý&'ï ‡ 3XWýWKHý&'ýEDFNýLQýLWVýFDVHýDIWHUýXVHýWRýSUHYHQWý ZDUSLQJï ‡ %HýFDUHIXOýQRWýWRýVFUDWFKýWKHýVXUIDFHýRIýWKHý&'ý ZKHQýSODFLQJýLWýEDFNýLQýWKHýFDVHï ‡ $YRLGýH[SRVXUHýWRýGLUHFWýVXQOLJKWñýWHPSHUDWXUHý H[WUHPHVñýDQGýPRLVWXUHïý ‡ $ýGLUW\ý&'ýPD\ýQRWýSOD\ýFRUUHFWO\ïý,IýDý&'ý GRHVýEHFRPHýGLUW\ñýZLSHýLWýZLWKýDýVRIWýFORWKýLQýDý VWUDLJKWýOLQHýIURPýFHQWHUýWRýHGJHïý CAUTION: Do not use any solvent (for example, conventional record cleaner, spray thinner, ben- zine, etc.) to clean a CD. -
Page 31: Troubleshooting
Troubleshooting ‡ ,Iý\RXýDUHýKDYLQJýDýSUREOHPýZLWKý\RXUý6\VWHPñýFKHFNýWKLVýOLVWýIRUýDýSRVVLEOHýVROXWLRQýEHIRUHýFDOOLQJýIRUýVHUYLFHï ‡ ,Iý\RXýFDQQRWýVROYHýWKHýSUREOHPýIURPýWKHýKLQWVýJLYHQýKHUHñýRUýWKHý6\VWHPýKDVýEHHQýSK\VLFDOO\ýGDPDJHGñýFDOOýDýTXDOLILHGýSHUVRQñýVXFKýDVý \RXUýGHDOHUñýIRUýVHUYLFHï Symptom 1RýVRXQGýLVýKHDUGï 3RRUýUDGLRýUHFHSWLRQ 7KHý&'ýVNLSVï 7KHý&'ýGRHVýQRWýSOD\ï 7KHý0'ýFDQQRWýEHýLQVHUWHGï 5HFRUGLQJýFDQQRWýEHýPDGHýRQý0'ï 7LPHUýIDLOVýWRýVWDUWï 8QDEOHýWRýRSHUDWHýWKHý5HPRWHý&RQWUROï 2SHUDWLRQVýDUHýGLVDEOHGï Possible Cause ‡ &RQQHFWLRQVýDUHýLQFRUUHFWñýRUýORRVHï ‡ +HDGSKRQHVýDUHýFRQQHFWHGï ‡ 7KHýDQWHQQDýLVýGLVFRQQHFWHGï ‡ 7KHý$0ý/RRSý$QWHQQDýLVýWRRýFORVHýWRýWKHý 6\VWHPï ‡ 7KHý)0ý:LUHý$QWHQQDýLVýQRWýSURSHUO\ý H[WHQGHGýDQGýSRVLWLRQHGï 7KHý&'ýLVýGLUW\ýRUýVFUDWFKHGï 7KHý&'ýLVýXSVLGHýGRZQï $Qý0'ýKDVýDOUHDG\ýEHHQýLQVHUWHGï 7KHýDFFLGHQWDOýHUDVXUHýSUHYHQWLRQýNQREýRIýWKHý 0'ýLVýVHWýWRýWKHýRSHQýSRVLWLRQï 3UHVHQWýWLPHýLVýQRWýFRUUHFWï ‡ 7KHýSDWKýEHWZHHQýWKHý5HPRWHý&RQWUROýDQGý WKHýVHQVRUýRQýWKHý8QLWýLVýEORFNHG ‡ 7KHýEDWWHULHVýKDYHýORVWýWKHLUýFKDUJHï... -
Page 32: Specifications
2XWSXWý3RZHU êíý:ýõìèý:ýòýìèý:ôýDWýéýRKPVýõ0D[ïô ,QSXWý6HQVLWLYLW\î,PSHGDQFHýõìýN+]ô /,1(ý,1ýõ$8;ýìô èííýP9îçíýNRKPV 2SWLFDOý,Q ¤ëéýG%Pýðý¤ìèýG%P 2XWSXWý6HQVLWLYLW\î,PSHGDQFHýõìýN+]ô /,1(ý287 èííýP9îèýNRKPV 6XEZRRIHU íýðýìééýP9îêíýNRKPV 6SHDNHUýWHUPLQDOV éýðýìçýRKPV 3KRQHV ìçýRKPVýðýìýNRKPV MD Player :RZý$QGý)OXWWHU 8QPHDVXUDEOH CD Player :RZý$QGý)OXWWHU 8QPHDVXUDEOH Tuner )0ý7XQHU 7XQLQJý5DQJH åæïèýðýìíåïíý0+] $0ý7XQHU 7XQLQJý5DQJHý õ0:ôýèëëýðýìñçëäýN+] Speaker Specifications õHDFKýXQLWôý6SHDNHUV åýFPýFRQH ,PSHGDQFH éýRKPV 'LPHQVLRQV ìëíý ýìçíý ýìäíýPPýõ:î+î'ôý... - Page 33 VICTOR COMPANY OF JAPAN, LIMITED EN, GE, FR, NL, SP , IT 0598MNMCREOZK...